Ad Log MCP Tool Beta Walkthrough
This walkthrough shows the beta workflow for using the Statlas Ad Log MCP tool to import a batch of ads, review the generated preview, request changes, approve the entry, and confirm that the final records are ready to deploy.
The example uses the testing_training shop and a Google Drive folder containing the ad assets. The exact folder and shop will be different for each request.
The tool is designed around a review gate. Submitting a folder starts processing, but the Ad Log entry is not written as final until the preview has been reviewed and explicitly confirmed.
Workflow at a glance
- Install and test the MCP plugin.
- Submit the asset folder and shop.
- Wait five minutes, then poll the request.
- Open and review the read-only Statlas preview.
- Request metadata, copy, or grouping changes.
- Review the updated preview.
- Explicitly confirm the entry.
- Add campaign and ad set IDs if needed.
- Poll again until the entry is
ready_to_deploy.
1. Install and test the MCP plugin
Before running the Ad Log workflow, install the test MCP plugin used for the beta walkthrough. In this example, the plugin page is labeled CTC - TEST MCP v3 and shows the app name, developer, category, and version information.
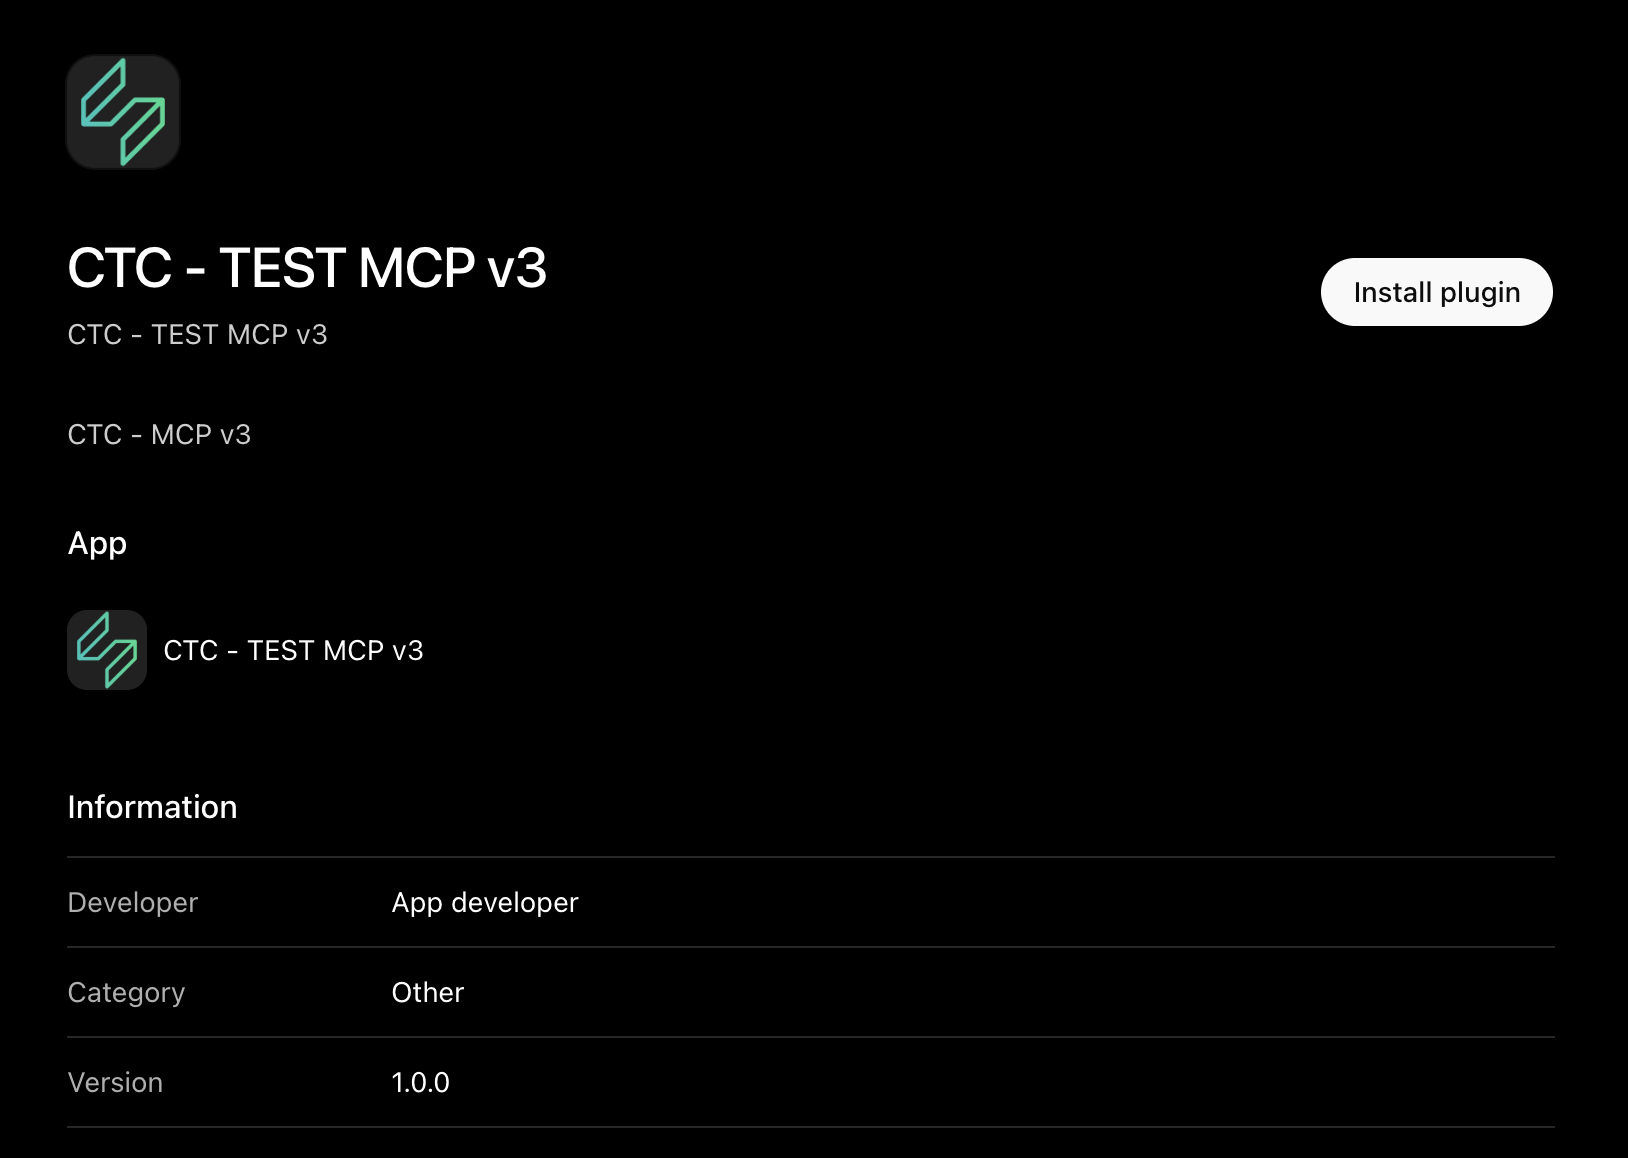
Select Install plugin to make the test MCP available in the app. This is the setup step for the walkthrough; once the plugin is installed, continue by submitting an Ad Log folder and shop.
2. Submit the folder for import
Start by asking the MCP tool to enter the Google Drive folder into the Ad Log and provide the shop name. The folder URL is the source of the assets; the shop identifies where the batch belongs.
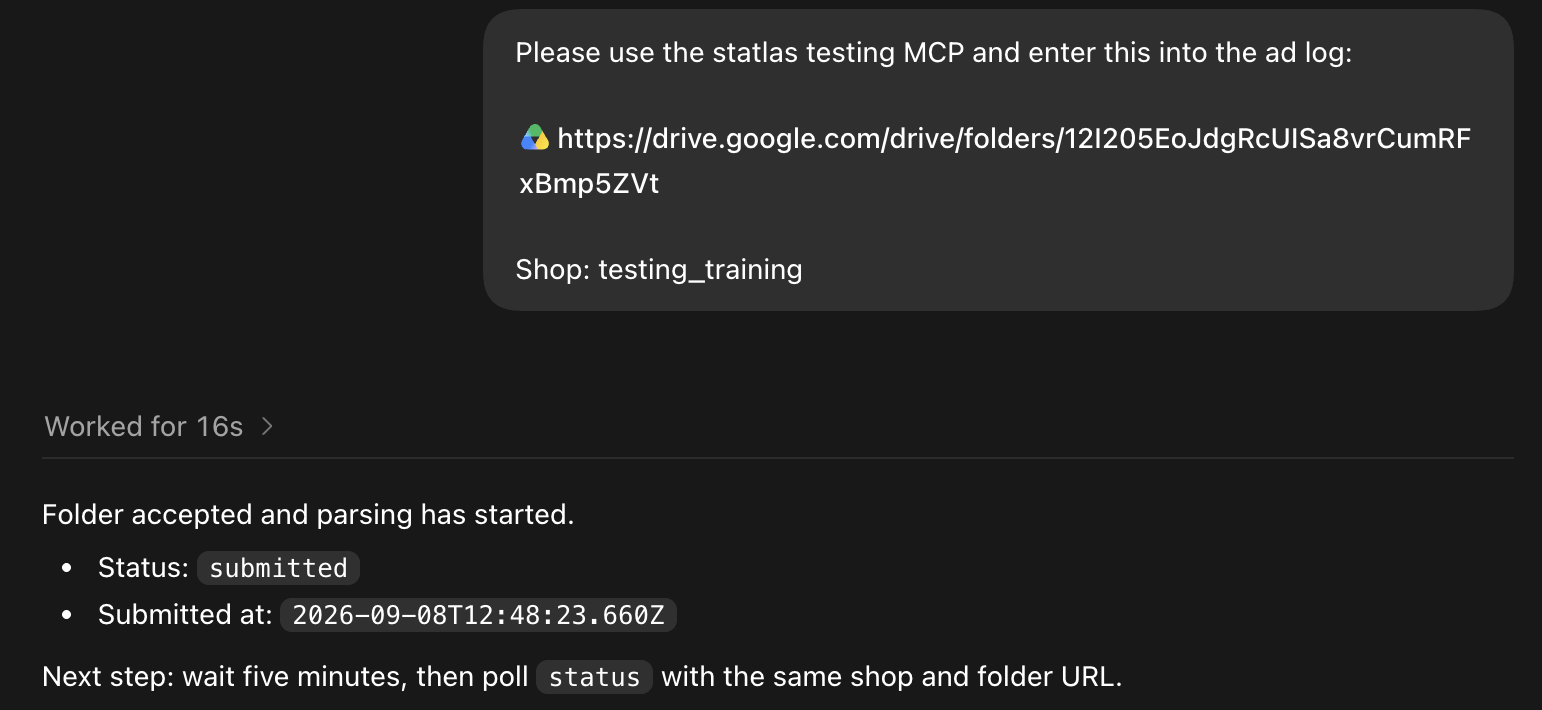
The tool acknowledges the request with status: submitted and a submission timestamp. Parsing has started, but the ads are not ready for review yet. The next action is to wait about five minutes and poll using the same shop and folder URL.
3. Poll until the preview is ready
After the processing window, send a poll request with the same identifying information. In this example, the tool reports that six proposed ads and six preview entries were created without errors.
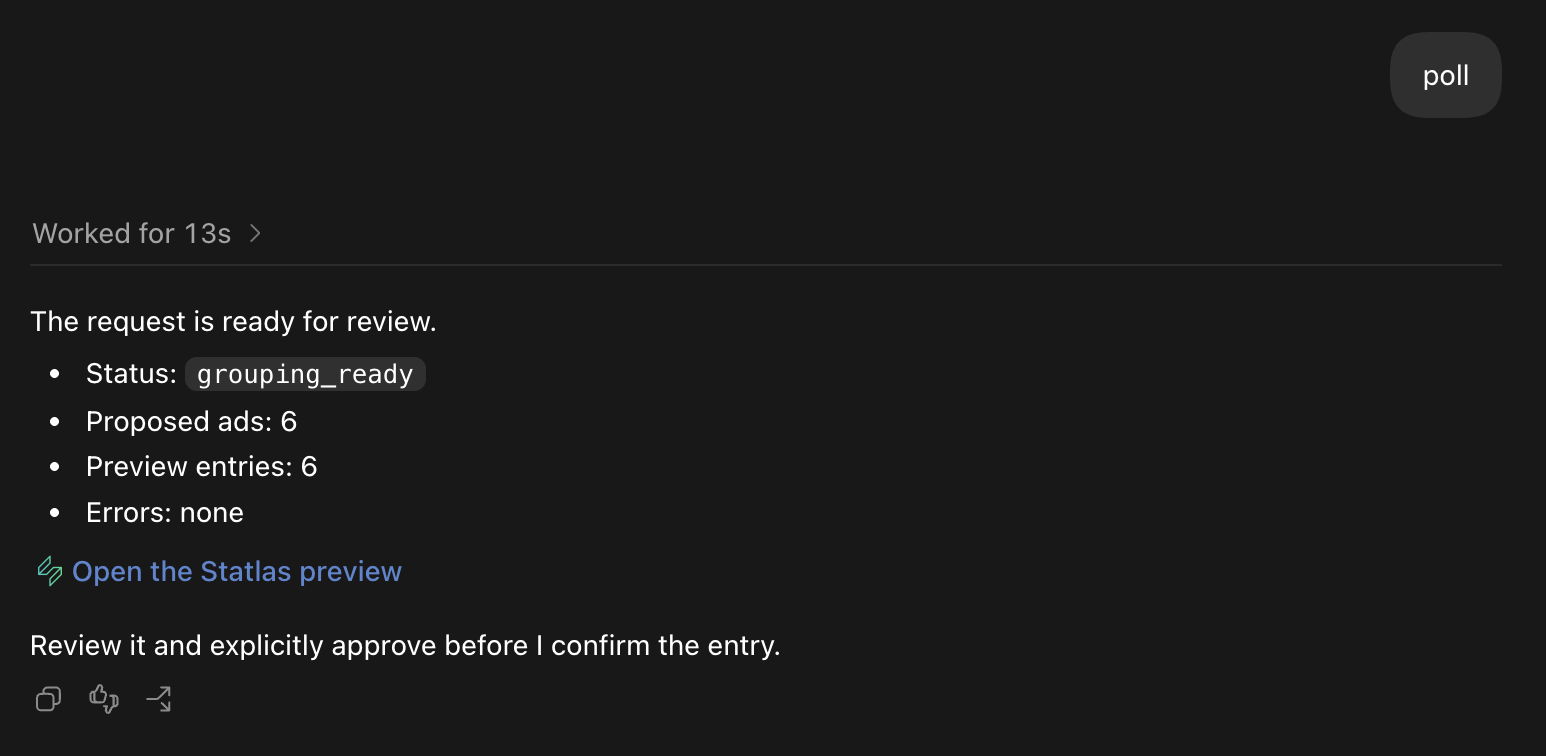
The important state is grouping_ready. This means the initial import and filename-based grouping are complete, and the batch can be inspected in Statlas. The tool provides a link to the preview and asks for explicit approval before confirmation.
4. Review the initial preview
Open the Statlas preview and check the asset groupings, ad copy, destinations, and metadata. The preview is read-only at this point.
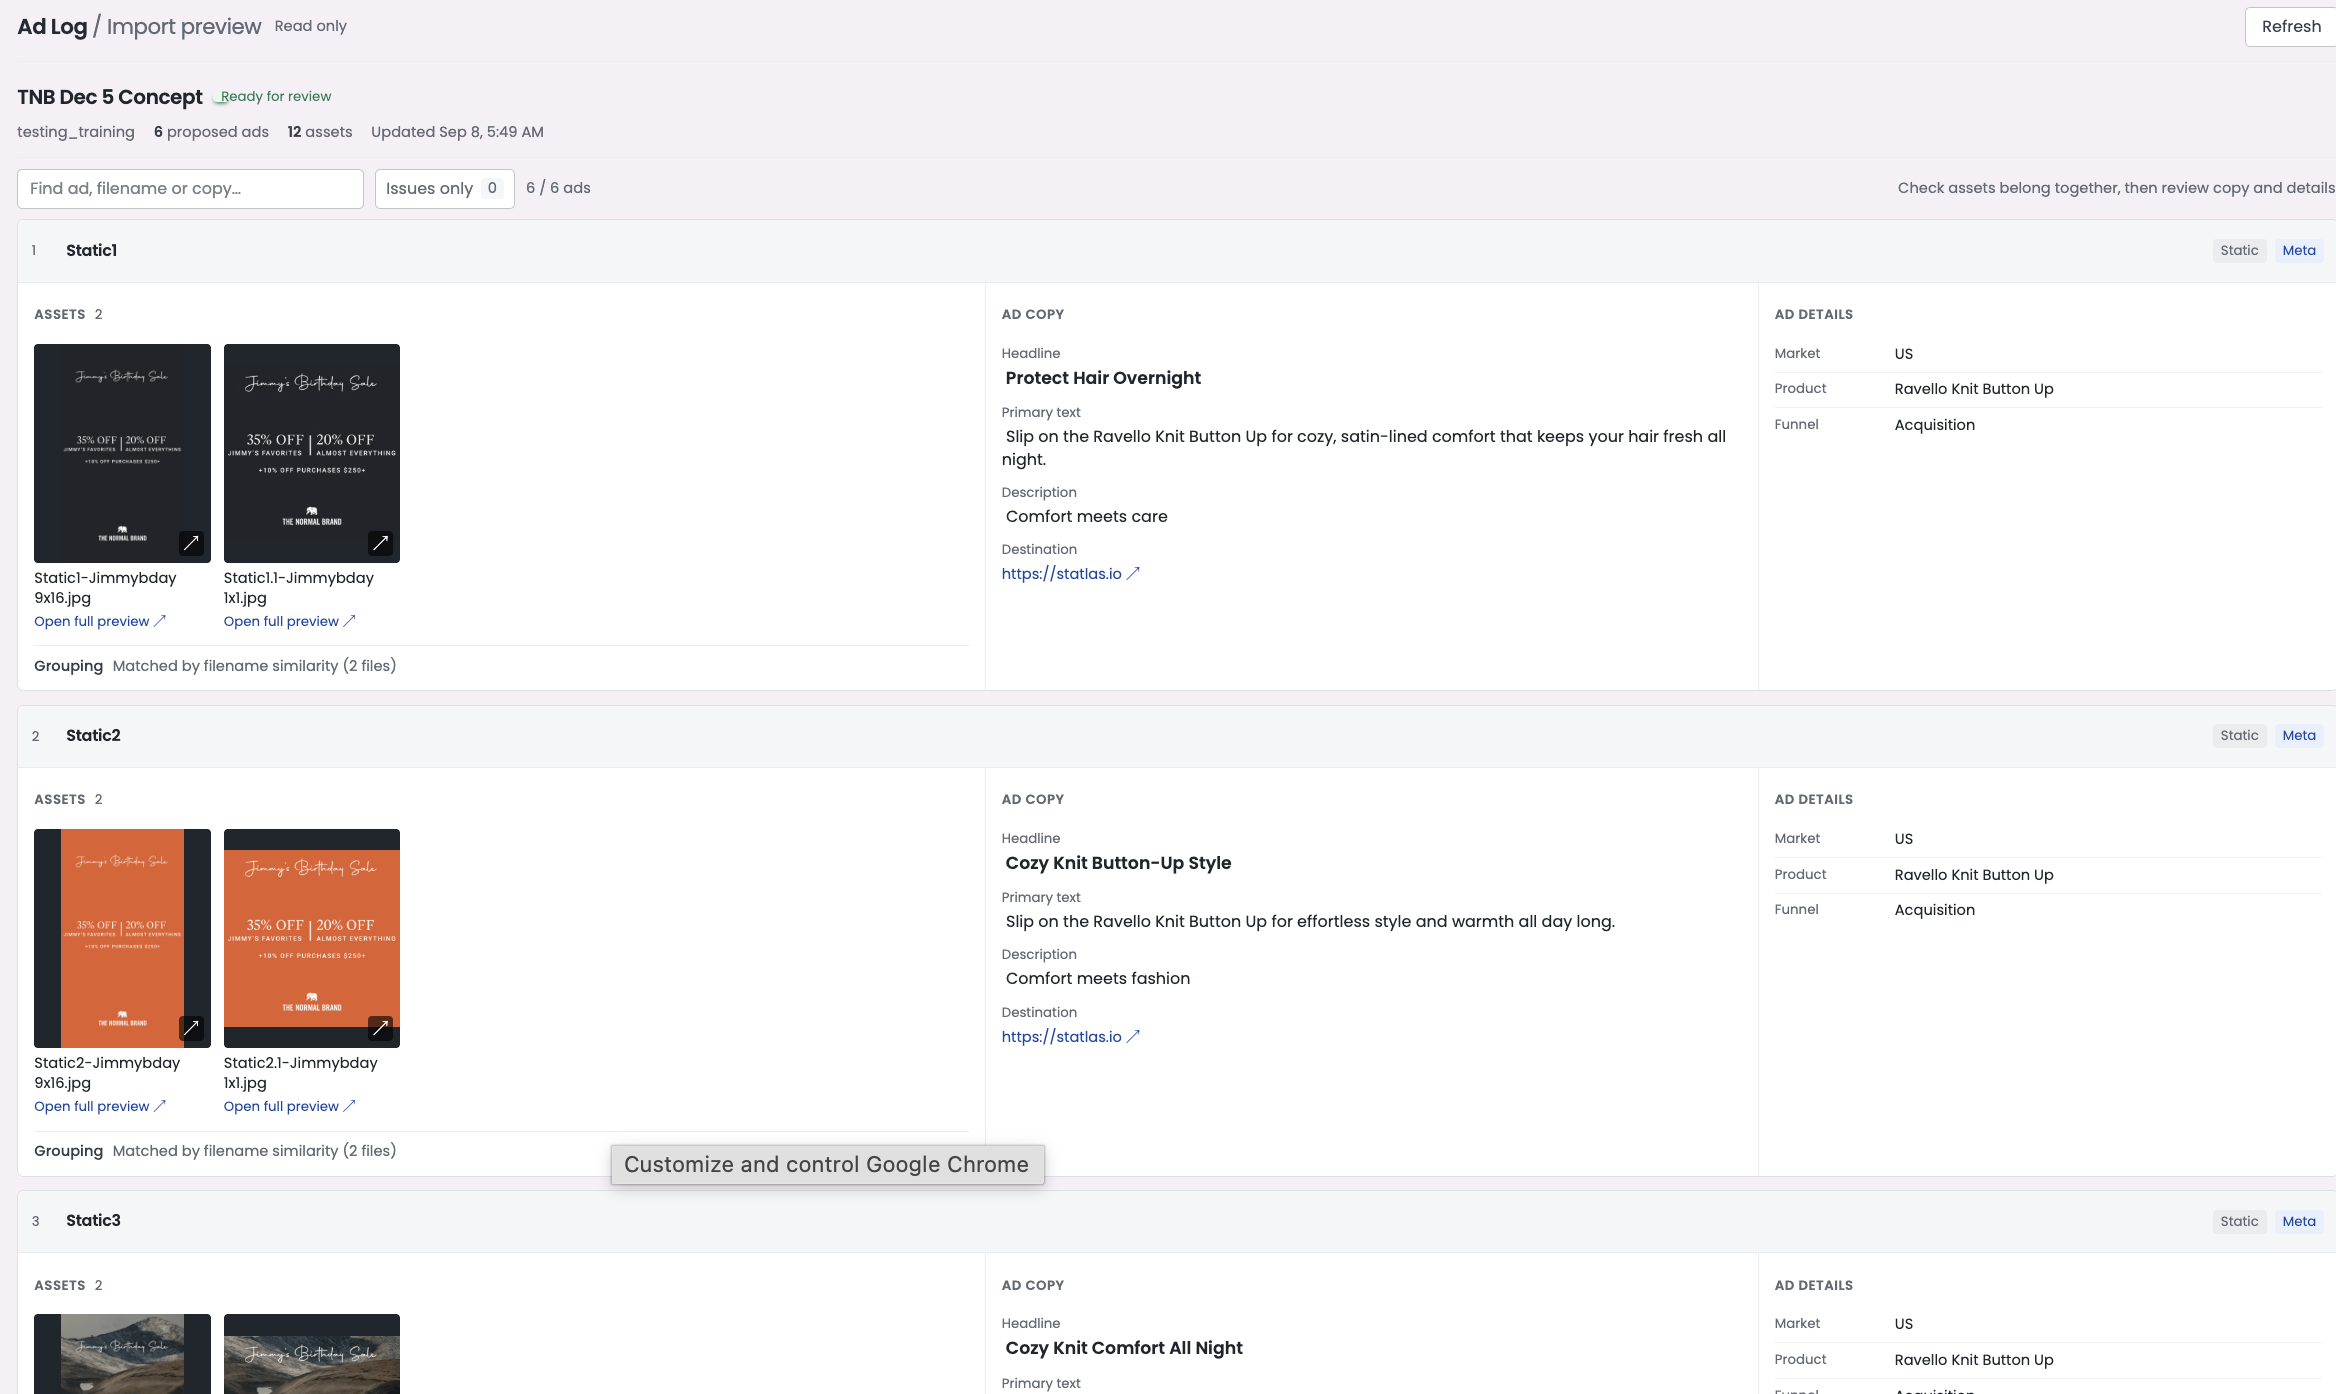
In the example, six ads are shown as separate proposed entries. The preview groups matching assets by filename similarity—for example, the two assets under Static1 and the two under Static2. This review is where you catch incorrect groupings, outdated URLs, missing metadata, or copy fields that should not be stored.
5. Request changes in one update
After reviewing the preview, provide the desired changes in a single MCP request. In this example, the request:
- changes the destination URL;
- removes descriptions;
- sets the start and end dates;
- assigns the producer;
- adds campaign tags;
- combines
Static1andStatic2into one carousel; and - sets the moment and product fields.
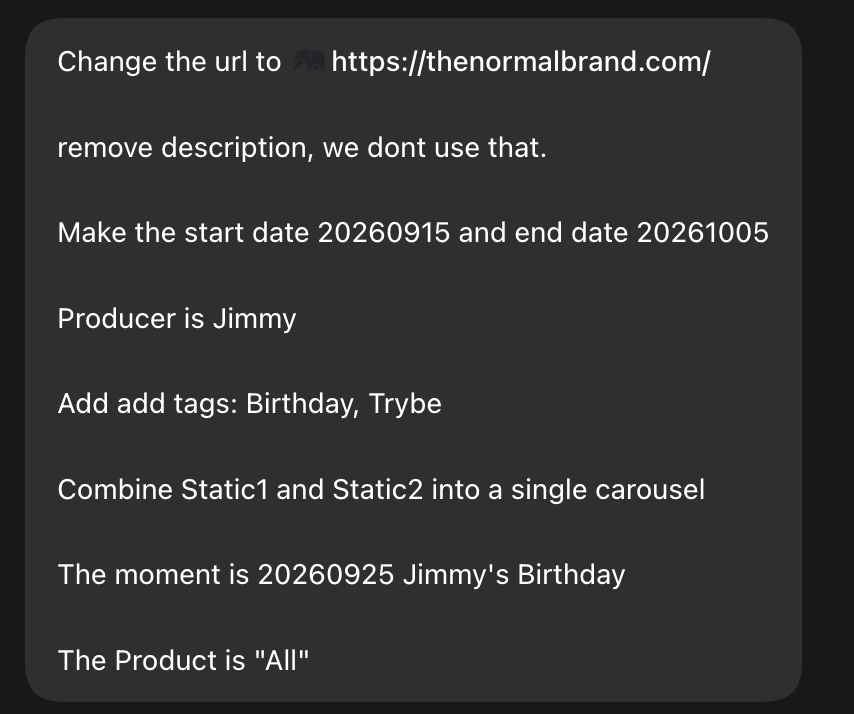
The tool can apply both field-level edits and structural edits in the same update. When asking for a grouping change, name the source groups and the desired format clearly.
6. Confirm that the update was saved
The update response summarizes what changed. Here, the six proposed ads become five because Static1 and Static2 are combined into a four-asset carousel.
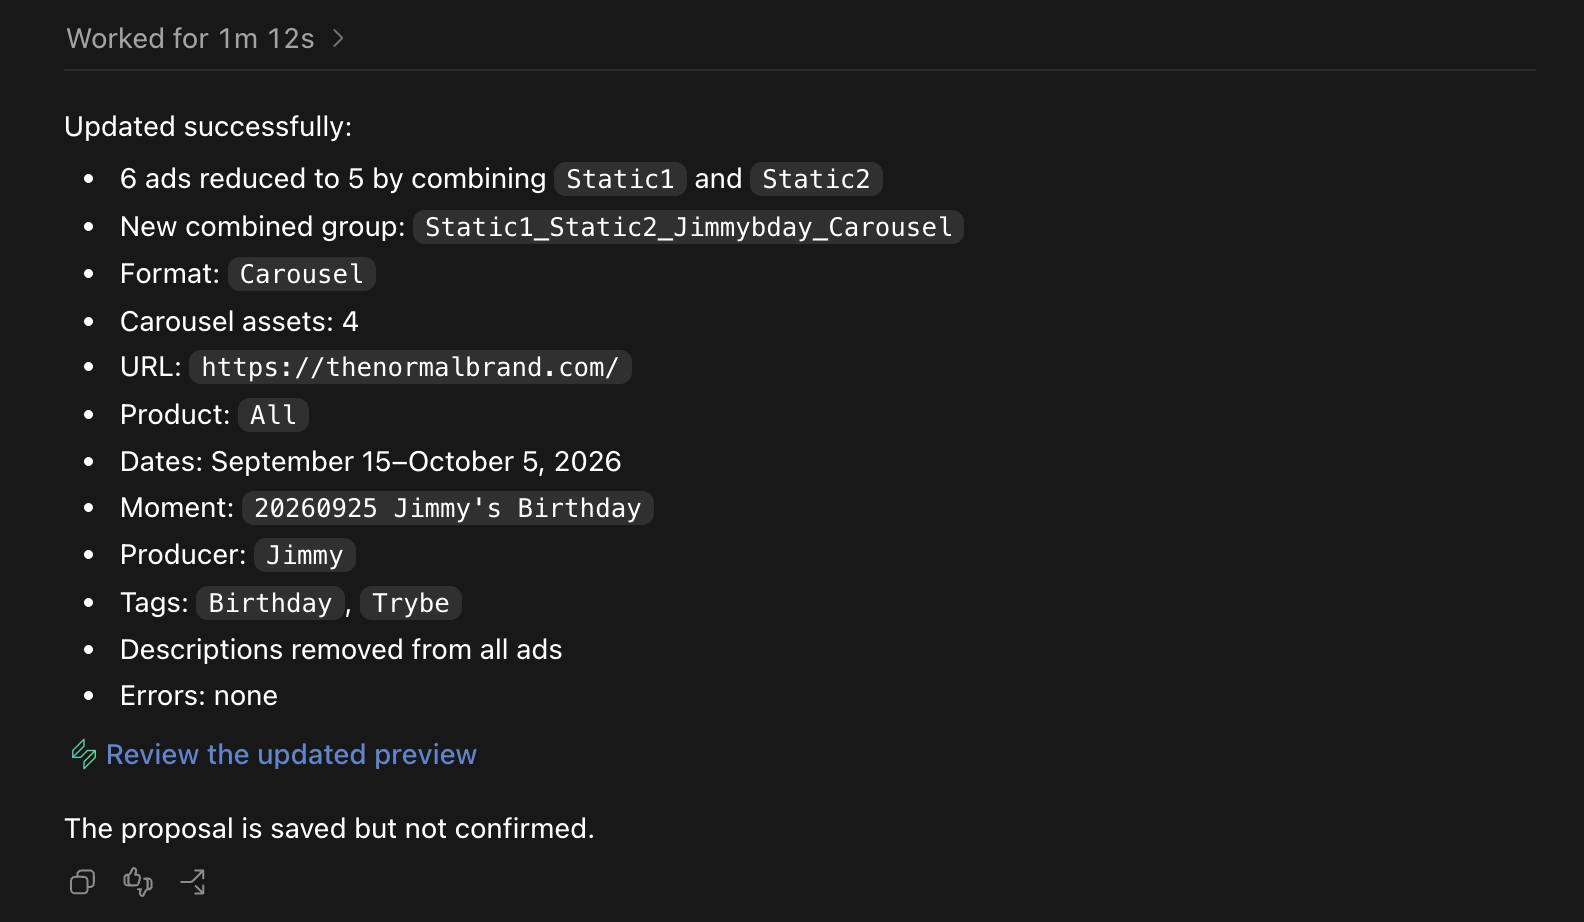
The response also confirms the URL, product, dates, moment, producer, tags, and removal of descriptions. Most importantly, it says the proposal is saved but not confirmed. Saving an update does not bypass the review gate.
7. Review the updated preview
Open the updated preview and verify that the requested changes are reflected in the rendered records. The example now shows five proposed ads, including the combined carousel.
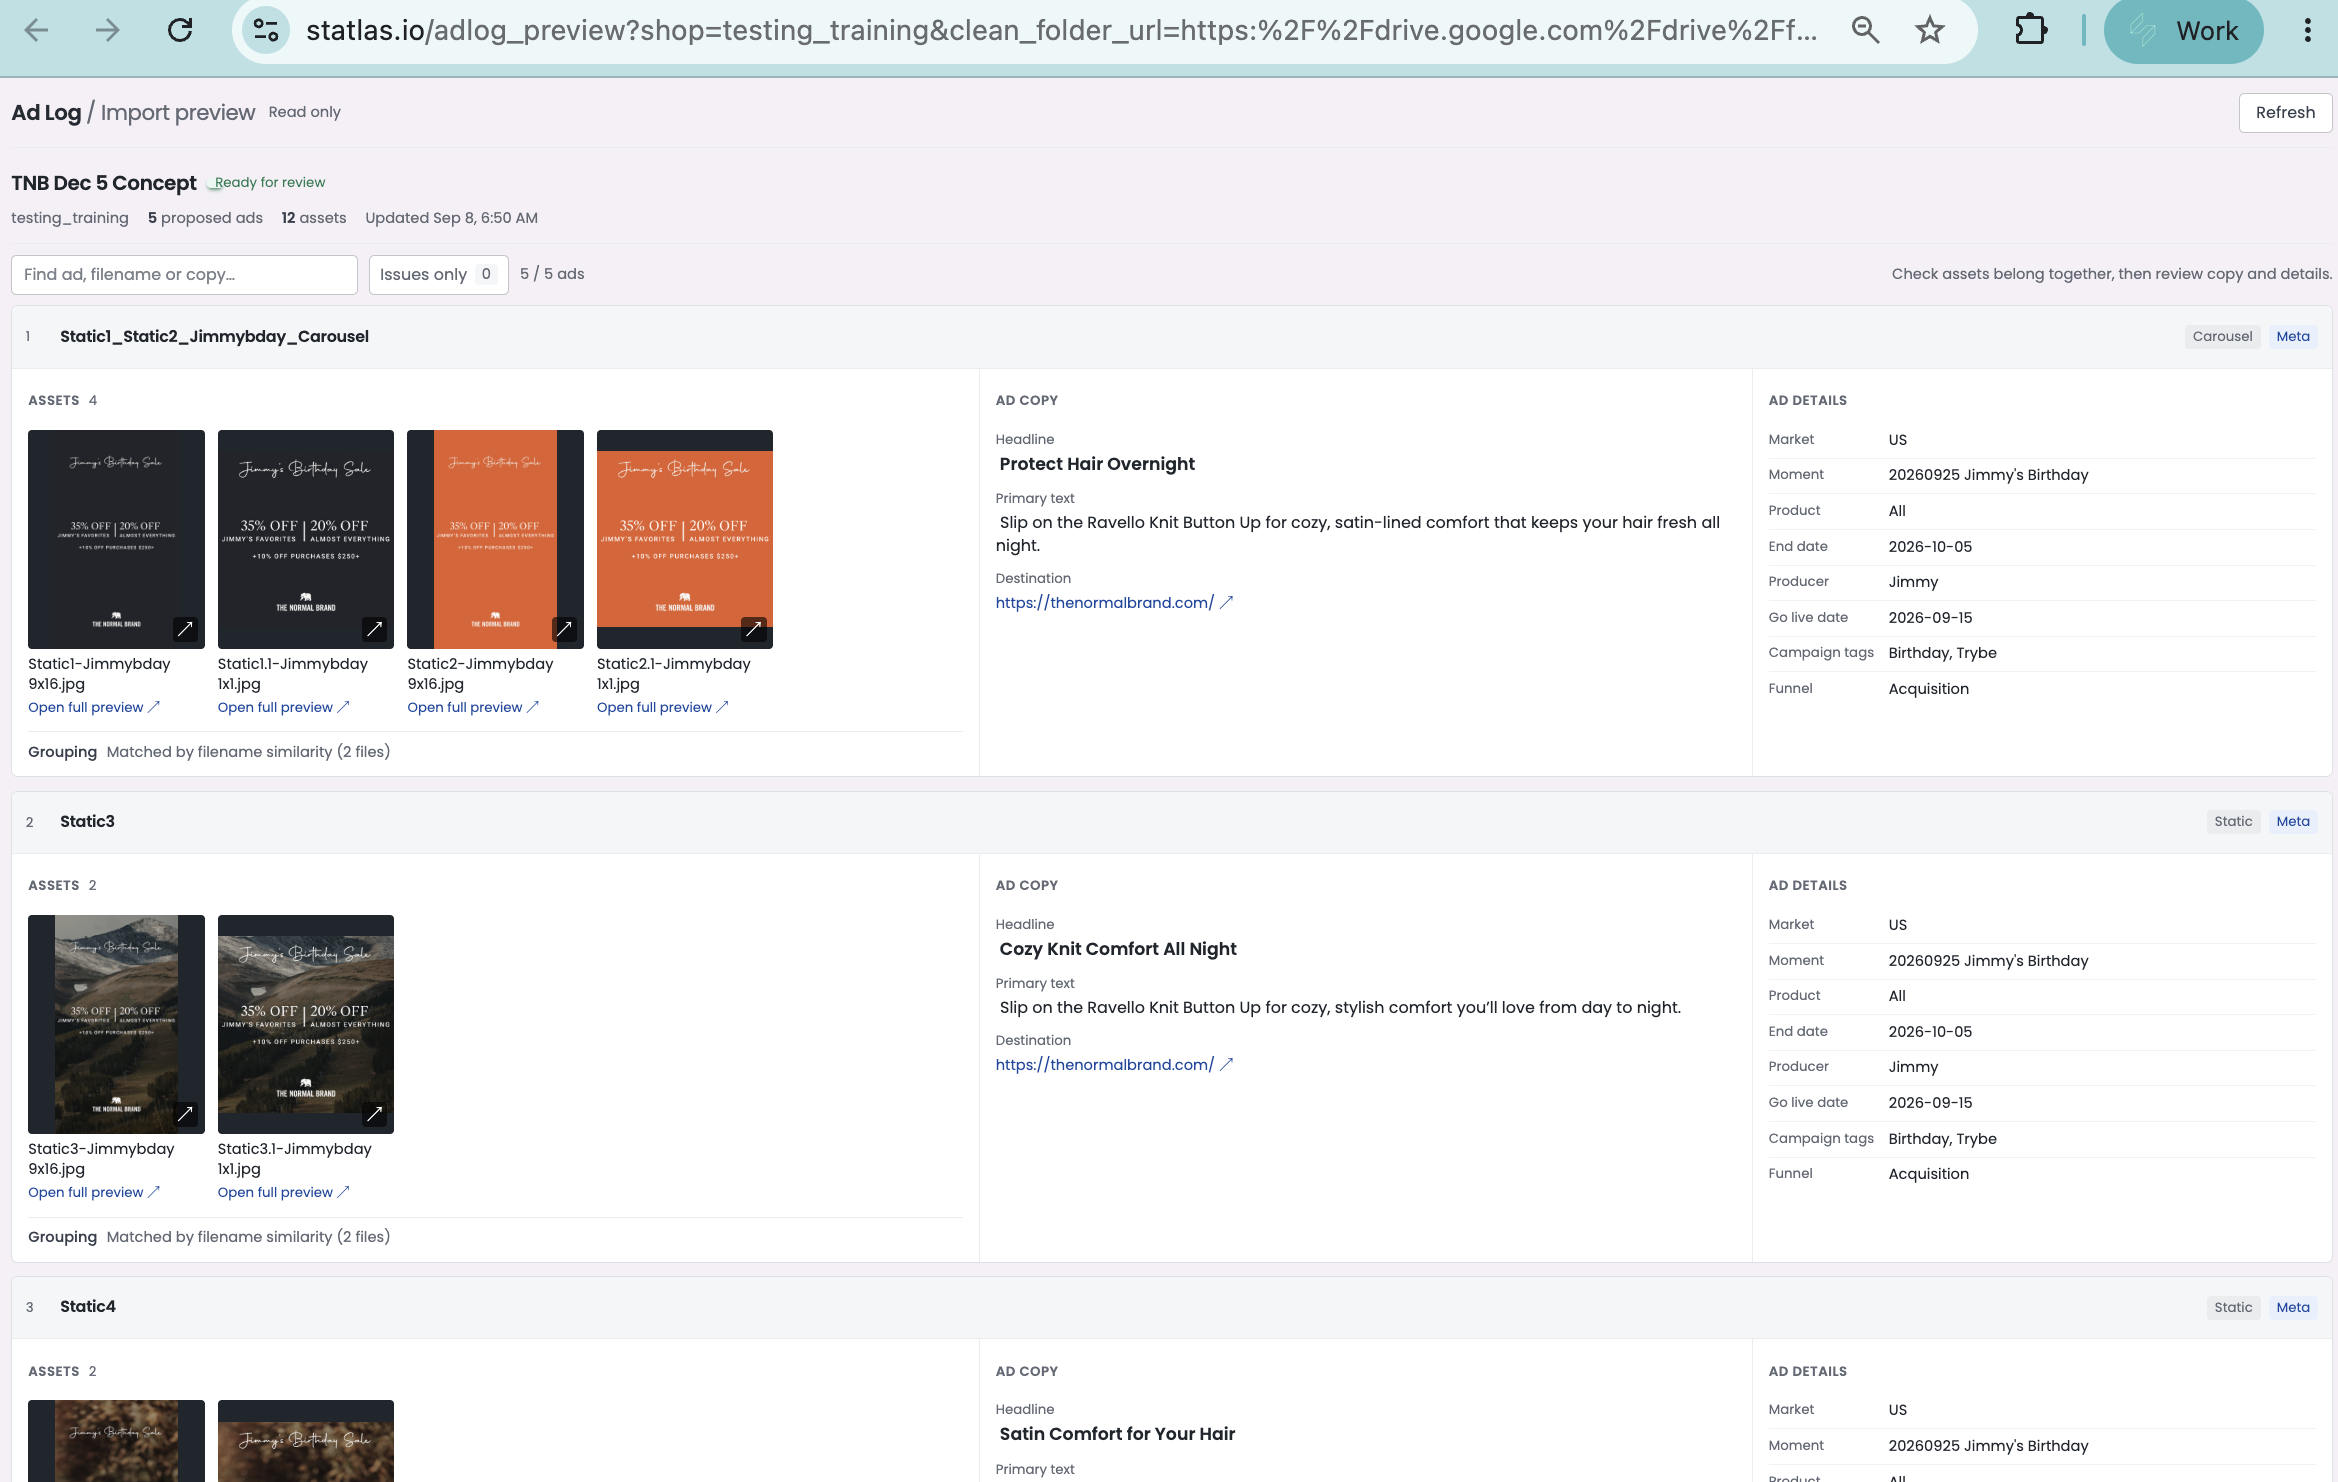
Check both the visual result and the structured fields. Confirm that assets belong together, the new grouping format is correct, the destination is right, and the campaign details match the request. If anything is wrong, send another update and review the preview again.
8. Explicitly confirm the entry
Once the updated preview is correct, explicitly ask the MCP tool to confirm it.
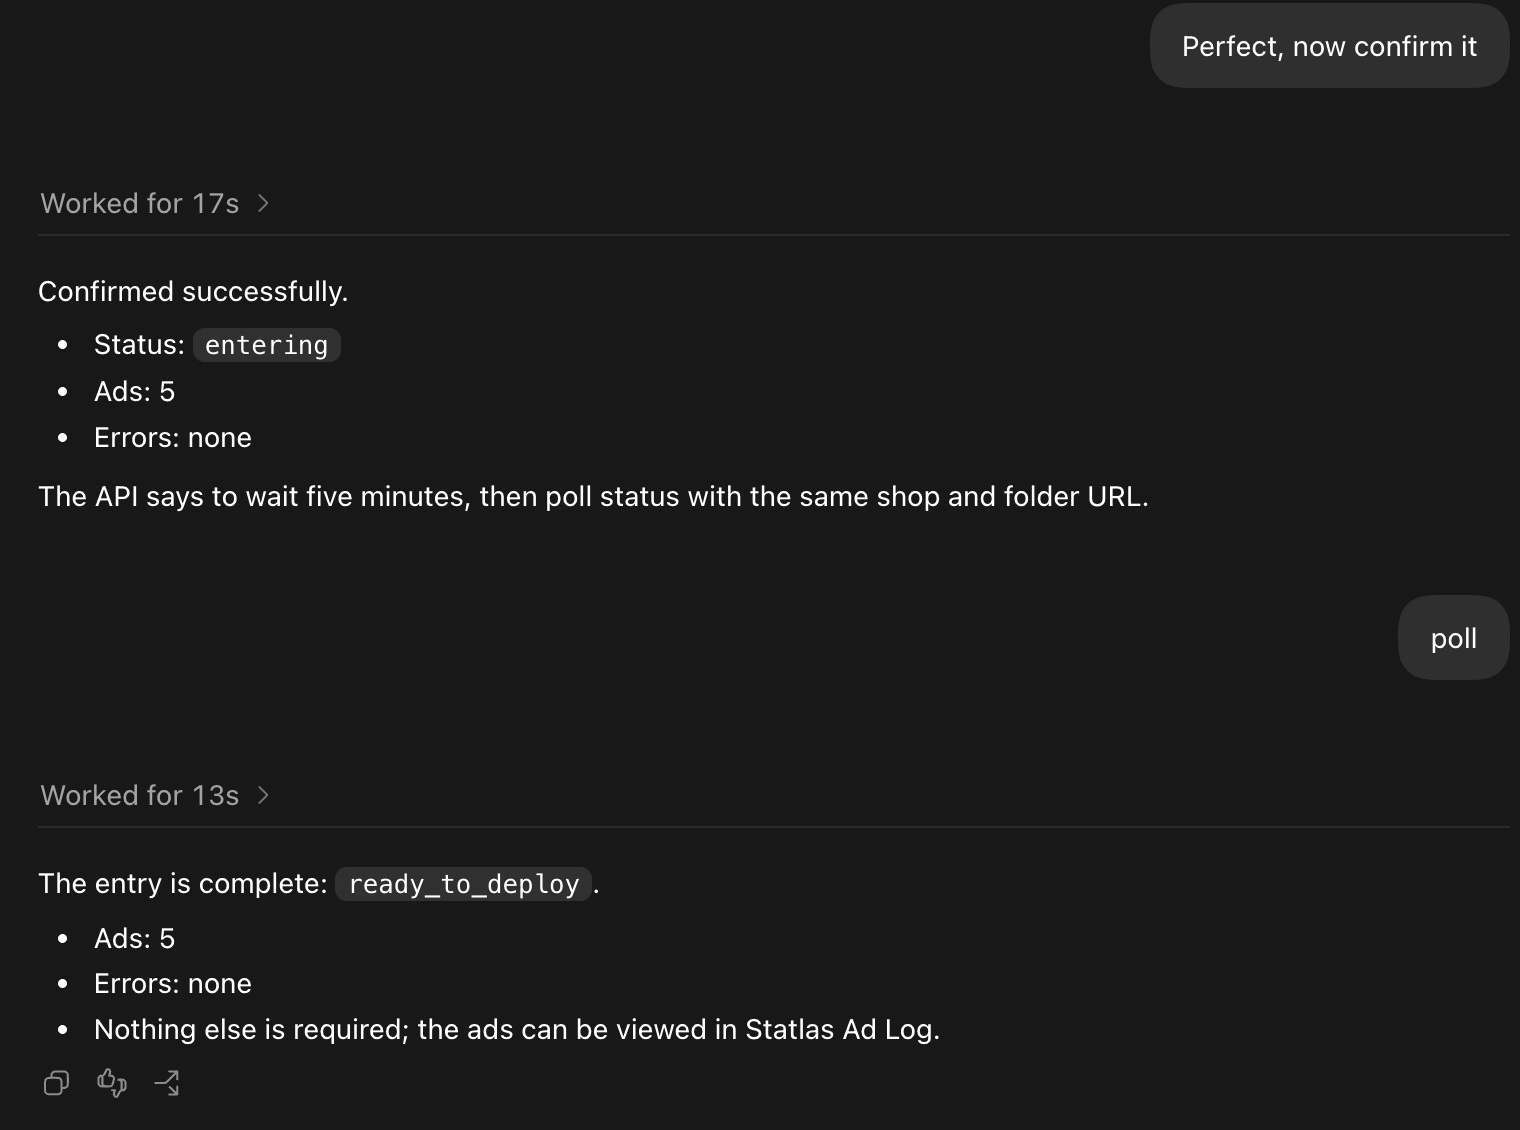
The confirmation response changes the entry to entering, with five ads and no errors. This indicates that the reviewed proposal is being written into the Ad Log. The tool instructs you to wait five minutes and poll again using the same shop and folder URL.
9. Add campaign and ad set IDs
After the entry is confirmed, add the campaign ID and ad set ID to all ads in the batch. In the example, campaign ID 123 and ad set ID 456 are applied across the five records.
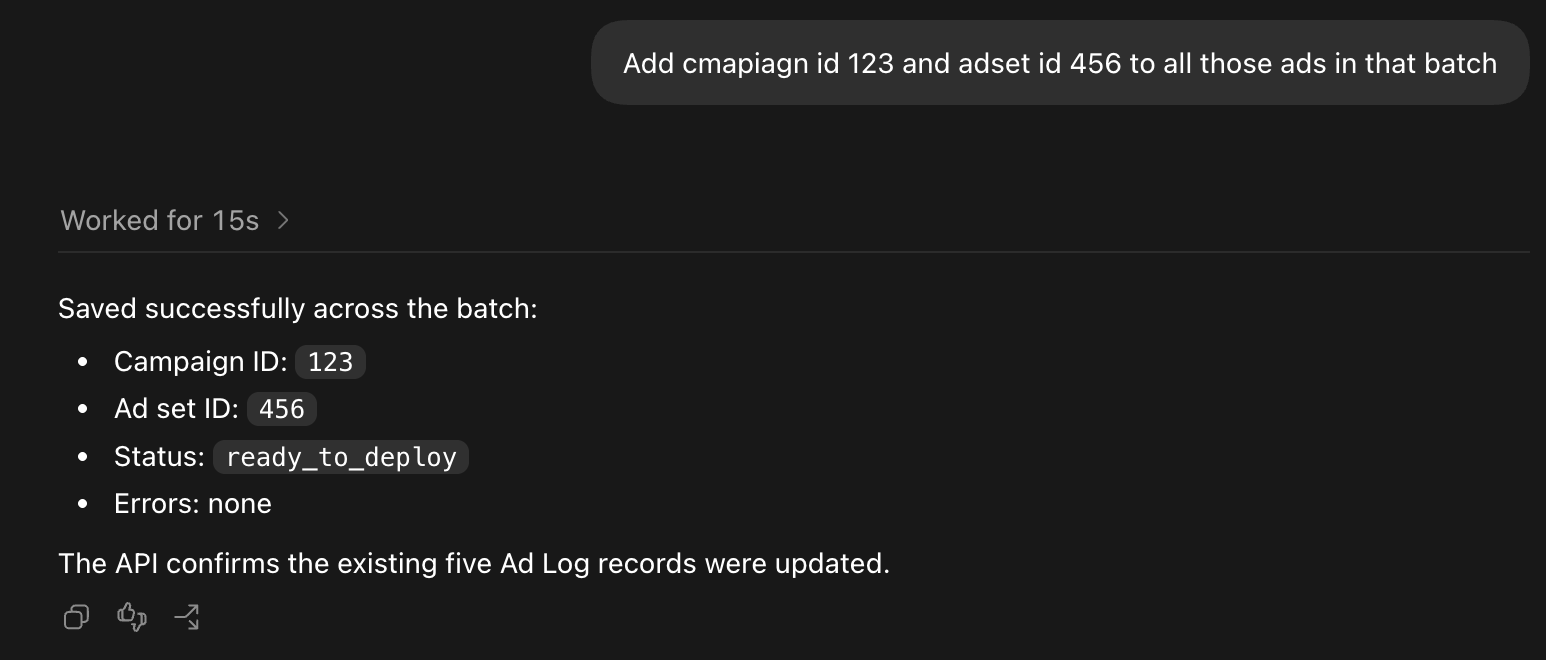
The response confirms that both IDs were saved, the entry remains ready_to_deploy, and no errors occurred. The API reports that the existing five Ad Log records were updated.
10. Poll for the final status
Finally, use the Ad Log MCP tool to confirm the completed state.
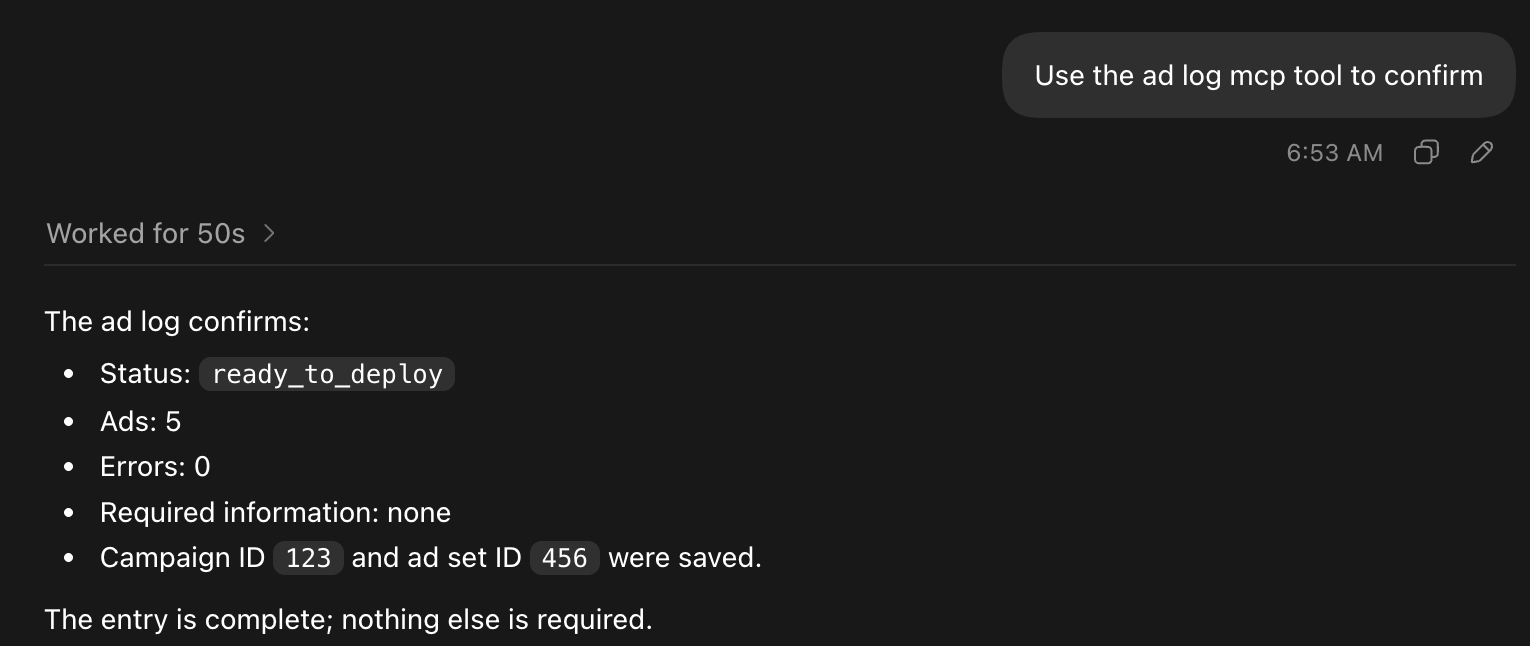
The final response confirms:
- status:
ready_to_deploy; - ads: 5;
- errors: 0;
- required information: none; and
- campaign ID
123and ad set ID456saved.
At this point, the entry is complete and no further action is required in the import workflow.
Status transitions
The example follows this progression:
submitted → grouping_ready → entering → ready_to_deploy
The preview and explicit confirmation steps sit between processing and final entry creation. Treat grouping_ready as a review state, not as approval.
Practical checklist
Before considering a batch complete, verify that:
- the folder and shop are correct;
- every asset is grouped with the intended ad;
- URLs, dates, product, moment, producer, and tags are correct;
- unused fields such as descriptions are removed when requested;
- the updated preview has been reviewed; and
- the final poll reports
ready_to_deploywith zero errors and no required information.